If you raise your own chickens, you’ve probably considered expanding your flock at some point – I surely have. Of course, the easiest way to add to your backyard flock is to purchase new chicks in a specialized store. However, this is not the only option – and way less fun. Hatching chicken eggs on your own is way more satisfactory and rewarding, and brings along numerous benefits.
Hatching chickens on your own is more sustainable and, in the long term, easier on your budget. It provides you with much more flexibility when it comes to the size and quality of your brood. Add to this a sense of accomplishment for helping bring a new life into the world.
Also, if you have kids, as I have, it can be very educational. Through egg hatching, children can learn their first lessons on the cycle of life. Not to mention how much they’ll love having cute and fluffy baby chicks running around the backyard.
Starting With Egg Hatching
Starting with egg hatching can seem a bit overwhelming and intimidating, especially if you’re a first-timer as I was. But, there’s nothing that you can’t handle with a little education, sometimes set aside, and willingness to see the whole thing through. Before you start there are several factors you’ll need to consider.
First of all, you’ll need to decide whether to go with natural hatching or use an artificial incubator. I say artificial because the broody hen is also a sort of incubator in itself. Be prepared for the fact that not all of the eggs are going to successfully hatch. Also, approximately half of the hatched eggs will turn out to be cockerels.
If you don’t have other use of them other than fertilizing the eggs, you should make plans for what to do with them.
Furthermore, in some states, local regulations don’t allow keeping roosters in residential areas. Don’t forget to think about the available space and how much time you have on your hands. Once you got through the whole process you’ll logically end up with more chickens demanding housing and care.
Still, we believe that seeing the chicks you helped come into the world will make all of this worthwhile. We’ll try to for through any question or dilemma you might have, so you get a better grasp of everything that awaits you.
How Long Does It Take for a Chicken Egg to Hatch Naturally?
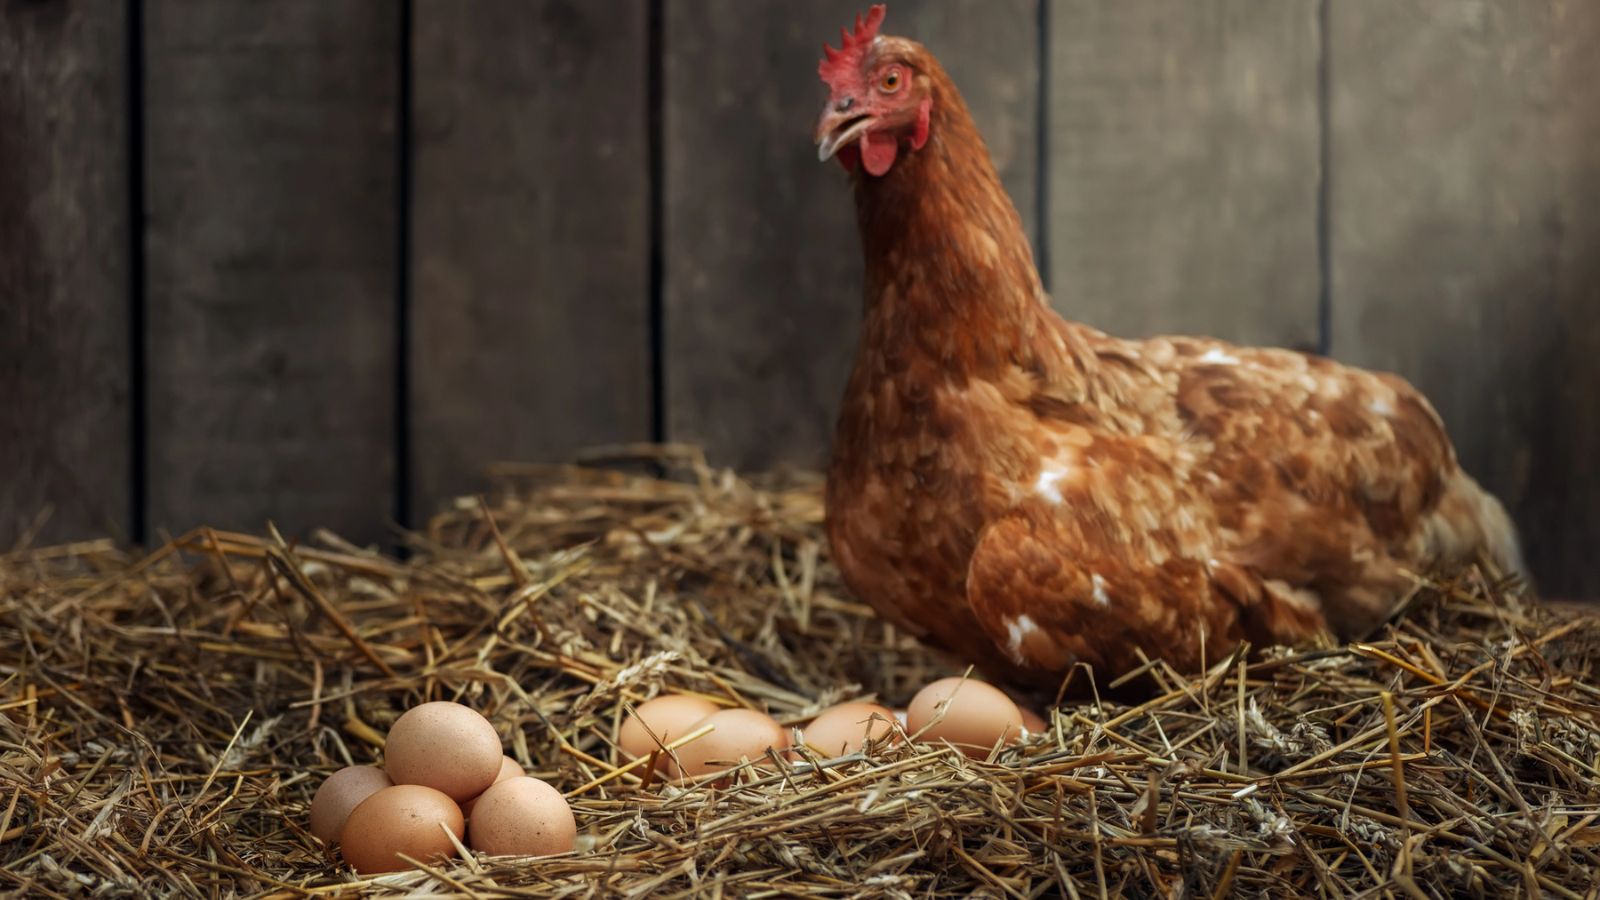
Many chicken owners prefer their egg hatching the old-fashioned way. They leave nature to do most of the work, meaning they are using a broody chicken to incubate the eggs until the little chicks pip out. If you leave broody hen to go about its business without your intervention, it will typically start brooding once it has built up around a dozen eggs in the nest box.
Be aware that eggs will start developing only when the hen is sitting atop of them continuously. Since hens tend to be a bit aggressive when brooding, try to disturb them as rarely as possible.
Once the brooding starts, the hen will sit on the eggs for 21 days. That’s the time the embryo within the egg needs to fully develop. During this time, the chicken will spend the large majority of her day sitting atop the eggs. It may leave them only for 20 or so minutes a day, to get food, during the water, and “stretch” legs a little. Remember to take note of the day the brooding starts, so you’ll have an idea when you can expect chicks.
The hatching will begin on the 20th 0r 21st day, and it can take a couple of days for the whole clutch to completely break out of shells. Just before this, around the 18th day, you may notice hen making vocalizations to the chick in a low-pitched sound. You may even hear the chick answering. You’ll also probably observe the chicken encouraging the chicks as they break out of the eggs. Within two to four days the whole clutch will hatch.
If there are any eggs left unhatched after this time, then they are probably not viable and it’s best to remove them from under the chicken.
Hatching Chicken Eggs Naturally
When hatching the eggs naturally, the first order of business is finding the rooster who is going to fertilize the eggs. If you don’t own a rooster, you’ll probably be able to loan one it and let him do its business.
The next thing on identifying a broody hen. The surest sign that the hen is broody is aggressiveness. When broody it will become aggressive towards you when you are collecting eggs and try to peck you. Broody hens also express animosity towards the rest of the flock.
You can also encourage a chicken to go broody. This is done by placing artificial eggs in the nest box and leaving them there for a while. These fake eggs look very much like real ones and you can easily buy them online or at specialized stores.
Not all of the chicken breeds are good for brooding. In order to have chickens as productive as possible, the brooding trait has been bred out of many breeds. However, there are still some breeds that can provide successful brooding, such as Asil, Brahma, Cochin, Dorking, Delaware, Barnvelder, and Dominque, Buff Orpington, and Silkie, among others.
Once you’ve found your brooding hen, you’ll need to decide where it will brood. Chickens prefer to do it in their favourite nesting box, but that causes problems because the other hens may lay their eggs under it, too.
Alternatively, you can designate a separate space for your brooding hen. It should be at least one square foot large, enabling the hen to reposition itself and turn the eggs without damaging them. Once the hen starts sitting on top of eggs continuously, the eggs will start to develop.
During incubation, the chicken will turn the eggs on a regular basis, so that’s one more thing off your mind. This way, the temperature will evenly distribute around the egg, and the embryo won’t get stuck to the shell.
Brooding hens are very protective of their eggs. They’ll try to fend off any predators by making noises and trying to peck them. The predators, in this case, also include you and other chickens. After about 21 days of brooding, the eggs will hatch. Once the clutch is hatched the hen will go on to take care of them, leaving any newer eggs in the nest.
Hatching Chicken Eggs in Incubator
There are many good sides to hatching the eggs naturally, but one thing this way of hatching lacks is consistency. Hatching eggs in an incubator is a more expensive and complex process, but it provides reliable results and the ability to hatch more eggs at once.
Currently, there are plenty of options available on the market. Be aware that the quality usually dictates the price of an incubator. If possible, avoid the cheapest ones so you can get at least satisfiable quality. One of the features that influence the cost of a new incubator is the options automatic controls for the egg turning. You can decide to go with manual controls, but it will require a little more involvement on your part.
Another thing you should pay attention to is if the incubator features forced or still air. Bear in mind that forced air will provide better air distribution. Also, consider how many eggs you will be hatching, and choose the size of the incubator accordingly.
When you have selected and purchased an incubator the next step is choosing the eggs for incubation. You should choose clean, good-sized, and proper-shaped eggs. They should be as fresh as possible. Once you chose the eggs, don’t do any extra cleaning as you may remove the coating that is supposed to protect the embryo. When you’re ready, place the eggs in the incubator with the wider side pointing up.
The eggs should be in the incubator for 21 days. This doesn’t mean that you should just set and forget them. You’ll need to regularly check temperature and humidity. If humidity is low, you can use damp sponges to increase it.
If you purchased the incubator with manual controls, you’ll have to turn your eggs also. Remember to clearly mark them with Xs and Os so you’ll always know which ones you’ve turned. You should turn the eggs at least three times a day. You can track what’s happening inside the egg by using candling lam. It helps you identify non-fertile eggs, but also is fun and educational, especially for the kids.
On the 18th day, you can stop turning the eggs, and leave them to hatch. By this time you should notice them moving, meaning the hatching is in progress. Once the chicks have hatched leave them to dry in the incubator and after that transfer them to the brooder box.
Temperature for Hatching Chicken Eggs
Before you place eggs in an incubator, they should be running for several hours or even the whole day. The reason for this is enabling it to reach the temperature necessary for hatching. You should set the temperature at 99.5 degrees Fahrenheit (37.5 Celsius).
Be aware that the embryos are very sensitive to temperature change. A variation of just 1 degree could kill them. This is one of the reasons why you should purchase a high-quality incubator. With a better incubator, you’ll experience minimal fluctuations. Every time you manipulate eggs and turn them, you’ll have to open the incubator lid and the temperature will change. Try to do this as fast as possible, so the temperature recovers before it becomes harmful.
In addition, try to place the incubator in the room with a steady temperature and minimum of the draft. You can ensure the precision of the gauge by double-checking with a medical thermometer.
Hatching Chicken Eggs Humidity Level
Similar to temperature, incubator humidity is an important factor in the egg hatching process. Egg moisture is crucial for hatching healthy chicks. If eggs don’t lose enough moisture before hatching, the chicks may drown while pipping. On the other hand, too low humidity may cause egg membranes to become too tough for chicks to break the shell.
There’s still no consensus among the experts on the exact humidity needed in the incubator. However, but it should be in the range of 25-60 % between the first and eighteenth day. During the last three days, eggs require increased humidity and you should set it to 70-80 %.
Most modern incubators have fairly simple methods of using water channels to control humidity. Make sure that you follow the incubator instructions, check regularly, and take into account the humidity in the area.
There are a few useful tips that can help you regulate humidity in your incubator. To be able to tell if there’s water in water channels and check the levels, add a couple of drops of food colouring to the water. Also, you can increase the humidity level by placing small damp sponges into the incubator.
Overview of What Happens in 21 Days Inside the Egg
From the start incubation period to the hatch day, the egg, and the embryo inside of it go through several different phases. Getting familiar with these developmental stages can help you in hatching chicken eggs on your own and identify on time if an egg is viable.
If you have a properly fertilized egg, the embryo development has started even before you put it in the incubator. During the first two days of incubations, the head, eyes, ears, heart, and nervous system all begin their development. In about three days since the start, the heart starts beating and wings, tail, and legs start to appear. Tounge and toes are next by the fourth day, and on day five reproductive organs start their development.
About this time you can start to track the development by candling the egg. on the seventh day, the leg begins to bend, and glands where the feather will grow appear.
Feather buds begging to grow on the eighth or ninth day. Also, in this time the egg tooth, necessary for breaking out of the shell, begins to develop. flight feathers begin growing on day 10. The next few days we see beak hardening, legs and scales are more visible, and claws begin to form. Also, this is the time of the forming of the so-called “wishbone”. During this stage, the embryo starts strengthening its bones with calcium from the shell.
By day 14, the fluffy down is almost covering the embryo. On the fifteenth day, the bones are already hardened, as is the egg tooth. During the next two days, the embryo sets itself into a hatching position, and the renal system starts with waste production. The process of absorbing yolk, which helps the chick survive without food immediately after it’s hatched, begins on the eighteenth day. this is the time when the embryo fills out the almost entire egg.
The embryo fully absorbs the yolk on day 20. It fills out the entire egg and the beak is ready to start poking through the shell. On the outside, you may already notice small cracks in the shell.
Most of the day 21 is spent hatching.
What Happens if the Eggs Don’t Hatch in 21 Days?
Sometimes, due to various reasons, the eggs don’t hatch on the 21st day. this can happen due to infertility, infection, improperly set incubator, or sick hen if you’re hatching naturally. Candling the eggs can help you determine the cause on time.
Some breeds naturally take a little longer to hatch. In any case, you can wait for 3 or 4 more days to see if the chick will hatch. Don’t try to break the shell yourself. If the embryo still hasn’t completely absorbed the yolk, it will die. If the egg doesn’t hatch after this time, remove it from the incubator or the brooding nest.
How Do You Tell if the Egg is Alive or Dead?
Sometimes you’re not sure if the embryo inside an egg is dead or alive. One way you can check it is by candling the egg. If the embryo is alive, you should see blood vessels and some movement. Also, the dead egg will feel a bit colder than the other eggs.
Also, you can try the floating test. Place the egg into the mildly warm water. If you notice some movement or slight jiggling, and the egg is floating at an angle than it’s alive. If the egg sinks to the bottom then it’s a sign that it only has a yolk in it, not an embryo.
What Do You Do After a Chicken Egg Hatches?
When hatched, a chick needs a safe environment, warmth, a dry place, and food and water. Immediately after hatching, give them some time to adjust. do not remove them from the incubator until all of the eggs hatches.
The peeping of newborns encourages others to break out of their shells. Their feathers will still be wet, so let them fully dry in an incubator. Remember they don’t need food for the first 24 hours. You may want to provide some water nearby though. By the time they hatch, you should have already prepared a brooder with a heat lamp.
If you went the natural way, the hen will provide the heat needed for its babies. Leave the brooder a bit uncovered so the hen can get out if it wants. You may also want to install a little ramp, so the chick can follow her and go for a stroll.