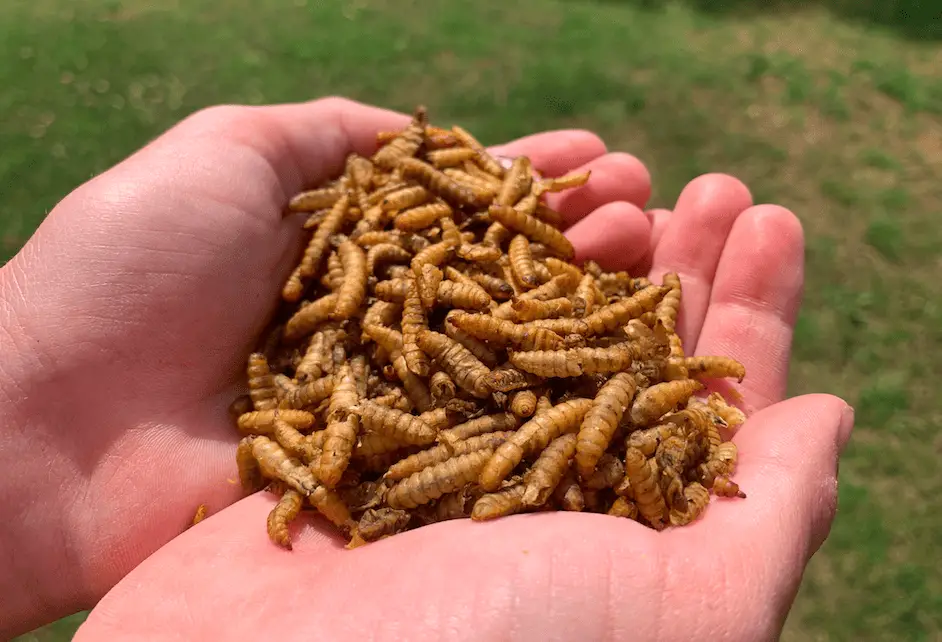
So I had to try this! I wanted to breed mealworms as a protein-rich feed for our backyard chickens. For most people, mealworms are just annoying pests, not very pleasant to look at. They see them only as those squishy and squirmy little crawlers that like to get into flour, cereals, or feed sacks and ruin them.
However, chicken owners know better and truly appreciate these small creatures. From our angle, they may seem unappealing, but from the chicken’s point of view, they are a tasty treat that they simply adore.
Key Takeaways
- Raising mealworms for chickens can be a cost-effective and sustainable way to provide them with nutritious food.
- The article provides a step-by-step guide on how to set up and maintain a mealworm colony.
- It emphasizes the importance of temperature, bedding, feeding, and moisture control for successful mealworm farming.
- The article also highlights the benefits of involving children in the process for educational purposes.
Why You Should Learn How to Grow Mealworms
You can buy mealworms at almost any feed store or even order them online. However, as chickens will gobble them up rather quickly, you’ll need to make sure that you always have enough to satisfy their appetite. Since store-bought mealworms are quite expensive, the costs can pile up very quickly. The good news is that you don’t have to buy them. You can take things into your own hands and breed them yourself.
Setting up and maintaining a mealworm colony is fairly easy and pretty fun. Plus, except small initial investment, it costs almost nothing. Mealworms don’t need much space and you can grow them virtually anywhere, including your living room. Furthermore, they’re very adaptable and can live and thrive in a variety of environmental conditions.
If you have children, it may be a good idea to put them in charge of the colony. Taking care of mealworms doesn’t require much expertise or effort, so they’re more than capable of doing it. This way, you’ll get a steady supply of protein snacks for your flock and kids will get a first-hand biology lesson.
For those willing to try setting up a colony on their own, I’ve prepared a detailed guide that should help you learn how to raise mealworms and hopefully answer any questions you may have about the process.
Ad: I thought you’d like these…

How Long Does it Take to Raise Mealworms?
The time you’ll need to farm the mealworms that your chickens can eat will vary depending on several factors.
During the summer, this process may take about 8 – 10 weeks, on average. However, in winter, when the temperatures are lower, it may take up to 5 months.
The number of mealworms you begin with will also influence the growth speed of the colony. Finally, humidity and temperature levels inside the container where you keep your mealworms also play a role.
What are the Stages of the Mealworm Life Cycle?
To get a better idea about how fast you can raise mealworms, you should first understand their life cycle. Mealworms are actually the insect called Darkling Beetle in the larval stage. The mealworm life cycle includes four phases – egg, mealworm or larva, pupa, and beetle.
Darkling Beetles mate and one female beetle can produce up to 500 eggs over 1-5 months. The more humid the environment, the more eggs it will produce. The eggs are white, tiny, and shaped like a bean. The egg will hatch into a larva after 1-2 weeks (12 days on average).
Larva or mealworm is initially very small and whitish. It takes around 3 months to fully grow, This period can vary depending on available food, humidity, and temperature. During this time, they will go through several moults or skeleton shedding. This can happen up to 20 times. As they grow older the mealworms will slowly change their colour, to more yellowish or golden. It’s important to remember that this stage is when yous should harvest the mealworms. After the final moult, the larva will transform into a pupa.
In the pupa stage, the mealworms are basically mummified and look like dead larvae, Pupae don’t move, drink, or eat at all. This phase will last 2-4 weeks, again depending on environmental conditions.
The final stage of the mealworm life cycle is hatching from a pupa to a beetle. At first, beetles are weak and have lighter colours, sometimes even white. As they mature, beetles will grow stronger and their colour will turn darker before finally becoming black and shiny. The maturing process lasts only a couple of days. After that Darkling Beetles are fully grown and live for a few months.
Mealworm Farm Setup: Equipment You Need (What Container is Best for Mealworms?)
Before you go shopping, you should decide if you want to start your farm in a single container or use the multi-tiered system. Both systems have their advantages and drawbacks.
Keeping your mealworms in a single container is easier, cheaper, takes up less space, and is perfect for first-time mealworm farmers. So that was what I opted for.
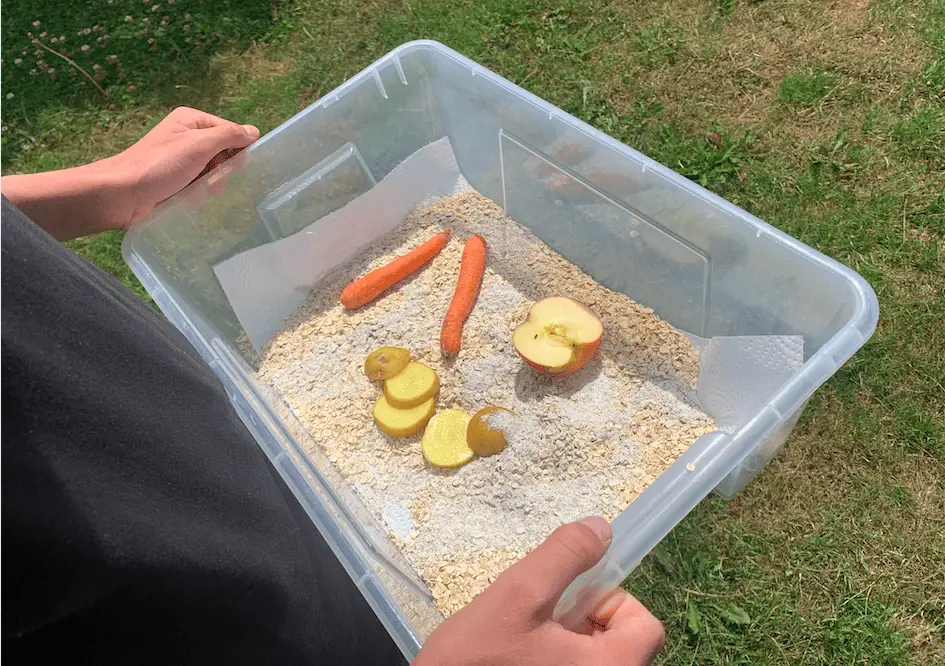
However, with this system, you can expect a lower yield as adult beetles may eat eggs, larvae, and pupae. Also, keeping insects in all four stages of development together will make harvesting more difficult.
On the other hand, separating mealworms into three or more different drawers will provide more efficient production and a greater number of mealworms. They will also be easier to harvest. Nevertheless, this farming type is more expensive. It also requires more space and more effort. I wouldn’t recommend this system to beginners.
If you’re going with a single container, you’ll need the following materials and supplies:
- Plastic container with smooth sides or glass aquarium
- Grain for bedding – you can use wheat bran, plain oatmeal, or cornmeal
- Slices of carrot or potato
- Mesh (if you don’t want to use the container’s lid)
- Paper towels, old newspaper, or scrapped cardboard
- Bucket sifter
- Mealworms (of course 😉 )
Also, make sure that you have the following tools handy:
- Drill (with drill bit)
- Duct tape
- Scissors
If you choose the multi-tiered option, prepare the following materials and supplies:
- Set of drawers
- Window screen or hardware cloth
- Mesh
- Grain for bedding – you can use wheat bran, plain oatmeal, or cornmeal
- Slices of carrot or potato
- Paper towels, old newspaper, or scrapped cardboard
- Bucket sifter
- Mealworms
The tools you’ll need with this system are pretty much the same as when using a single container.
You also need to know…
Essentials
What Kind of Bedding Do You Use for Mealworms?
The bedding or substrate that the mealworms live in is at the same time their source of food and a place to lay their eggs. There are several options when it comes to food you can use for substrate, but most people go with wheat bran or oatmeal. I
f possible, try to use organic food for your mealworm farm bedding. Be aware that mealworms can’t live in flour or similar fine-milled grains. Also, they can’t survive being made of whole grains. Wheat bran and oatmeal have just the perfect structure that allows the mealworms to feed and move freely. The amount of substrate will depend on the size of the container. In general, the bedding should be 2-3 inches thick.
Before placing the mealworms in the bedding. you’ll need to make sure that it’s not infested with grain mites. They can be found in almost all grains, even those you bought in-store for your consumption. If you skip this step, you might end up with what I had at one time: The sites may swarm your farm and provide competition for food to your mealworms. You can deal with the mites by putting the substrate in a microwave for about a minute. Alternatively, you can freeze it for 3 days – that’s what I did.
You should also add some pieces of old newspaper, scrapped cardboard, or paper towels on top of the bedding. The mealworms will use these pieces of paper to hide under them as they prefer to spend their time in dark places.
Your colony should have a certain level of moisture. Mealworms can’t drink water. They get the necessary moisture by eating pieces of fruit or vegetables. Adding potato or carrot slices should provide enough moisture for your farm. The amount you add will depend on the climate and humidity of the area you live in. If you notice that there is a piece that they’re not eating, remove it to avoid rot.
Once you set the bedding, you’re probably good for 3 or 4 months. After that, you’ll need to remove it and replace it with a fresh substrate. When doing this, use the bucket sifter to separate the mealworms from their waste. The leftover frass can be a great fertilizer for your garden.
You might also need a chicken poop shifter to pick up droppings and use those as fertilizer…
What Do Mealworms Eat?
The mealworms get all their food from the bedding or substrate. There are several types of foods you can put in the bedding that they will enjoy. The choice mostly comes down to your personal preference, price, and availability.
Wheat bran is the most popular choice for the substrate. You’ll most likely find it in the nearby feed store where they are mostly in 50-pound bags. Besides nutritious value, wheat bran is a good choice as it doesn’t compact thus providing larvae and beetles with enough space to freely move. It’s also very convenient when it comes to harvesting and separating mealworms.
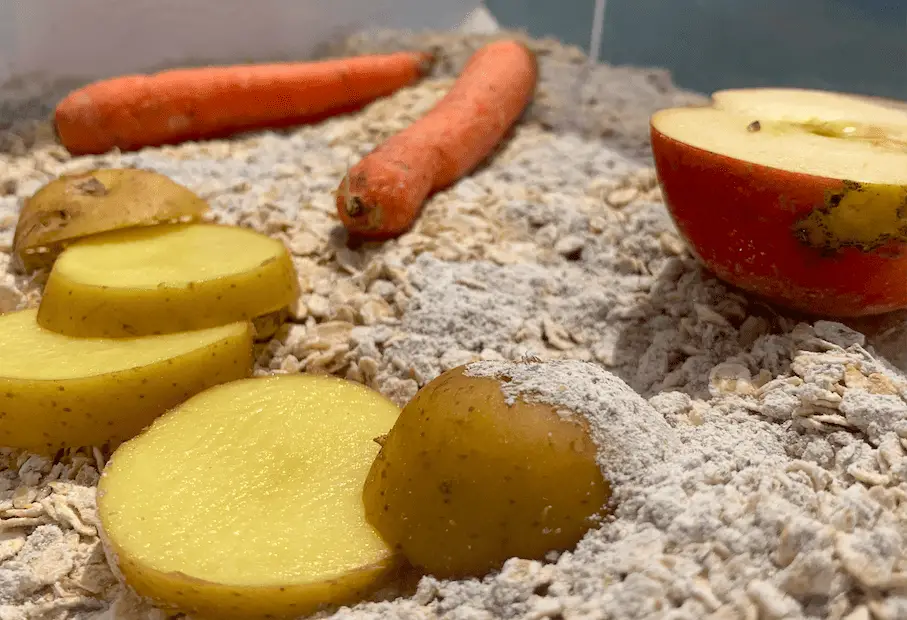
Another common option is oatmeal. When buying oatmeal for colony bedding, make sure that it’s the plain type. Avoid those with specific flavours. Any type of rolled oats will do. Feel free to use instant oats or Quick Cook oatmeal.
The only type to avoid is steel-cut oats as mealworms won’t be able to handle them due to the thickness. The downside of oatmeal bedding is that it can be too dense, limiting the mealworm’s ability to move. Also, this makes harvesting and sifting through the substrate a bit more difficult.
How Often Do Mealworms Need to Be Fed?
There’s no particular rule on how often you need to feed your mealworms. Basically, you can feed them as much as you like. The more food they have, the more productive your colony will be. You’ll likely need to add some food and top the substrate every few weeks to keep the bedding depth at around 3 inches.
In general, keep track of how your substrate looks like. When the grain particles start to look smaller and the bedding gets thinner, then it’s time to add some more food.
In addition, don’t forget to regularly add vegetable or fruit slices, so your mealworms will have enough moisture. Try to mix up your food offerings a little as a varied diet for mealworms will result in more nutritious food for your chickens. Also, as the mealworm builds up over time, you’ll need to replace the complete substrate every 3 or 4 months.
What Temperature Should Mealworms Be Kept at?
The conditions in which you keep your mealworms will greatly influence how productive your mealworms will be. They’re ectothermic creatures, which means that their metabolism depends on the environment. When it’s cold, their metabolism slows down. Correspondingly, keeping them in a warm place will speed up their metabolism.
So, for your mealworms to thrive they need a warm and, preferably humid location. If they’re cold, they may die, or at least the process of maturing will take much longer.
The ideal temperature for raising mealworms is in the 77 – 81 °F (25 – 27 °C) range. They will also do good if the temperature is somewhat lower, down to 72 °F (22 °C). They will reproduce at any temperature from 65 – 100 °F (18 – 38 °C), but at the bottom and top values of this range, the reproduction will significantly slow down. At colder temperatures, the larvae stage may take up to two years. Longer exposure to the extreme cold will kill them.
Too high of a temperature is not good either. Keeping them in an environment that is too warm also impacts their growth. Especially if paired will low humidity. In my experience, the pupal phase will last 6 days at 91 °F (33 °C), 7 days at 80 °F (27 °C), 10 days at 75 °F (24 °C), and 13 days at 70 °F (21 °C). If you live in a colder climate, you may need to use heaters to keep your colony warm enough. If you’re doing this, make sure you add plenty of vegetable or fruit slices to keep the humidity high enough.
| Temperature (°F) | Temperature (°C) | Pupal Phase Duration (Days) |
|---|---|---|
| 91 | 33 | 6 |
| 80 | 27 | 7 |
| 75 | 24 | 10 |
| 70 | 21 | 13 |
How to Farm Mealworms Step-by-Step
Step 1: Getting a Container
Before starting your mealworm colony, you’ll need to determine what kind of container you want to use and find it. You can go with a single container, or use a multi-tier system with a shelf containing several drawers.
If you’re going for a single container, there are several suitable alternatives to choose from. You get each of them for very little or no cost at all. The available options include an old aquarium or any kind of glass box, plastic storage container, or recycled trash bin. Aquariums and glass containers are perhaps the most fun option, especially for the kids as they can see what’s going on inside.
It’s important that the container is built of solid material, smooth on the inside (so the mealworms can’t crawl out), The material the container is made of should be the one that doesn’t rot, like glass or plastic. For this reason, you can’t use cardboard or plastic containers.
You will also need the lid for your container. It will keep the mealworms safe from potential accidents and keep the other insects such as spiders or moths out. To provide enough air for your mealworms, use the drill to pierce several small holes in the lid especially if you’re using a container made of non-porous material. You can use the 1/8-inch drill bit. Alternatively, you can cover the container with a mesh or window screen.
Ideally, the container should be 12 inches wide, 24 inches long, and 12 inches deep. Of course, if you can’t find this exact size, any container of similar proportions will do.
If you opt for the multi-tier system, you’ll need a shelf with at least three drawers. The point of this farming system is to keep your mealworms separated in different bins for each stage of their life cycle. The bottom drawer should hold pupae, the middle one is for mealworms and eggs, while the one on the top will be home to beetles.
The top bin holding beetles should look a bit different from the others. You’ll need to cut out the bottom of the drawer and replace it with a window screen or mesh. This will ensure that the freshly laid eggs won’t get eaten. Instead, they will fall through the bottom to the middle drawer. If you want you can add extra mealworm drawers. Doing this will enable you to rotate mealworm trays so those in the same tray will be about the same age.
This container system will require a bit more work than using a single bin. You’ll have to separate new pupae for the middle drawer by hand and move them to the bottom drawer so the mealworms don’t eat them. Newly hatched beetles can also eat pupae. You’ll have to keep an eye on the situation in the bottom tray and move the beetles to the top as soon as they hatch.

Step 2: Preparing the Container
Once you select the container you want to use, make sure to thoroughly clean and dry it. This is especially important if you’re starting your farm in a used container such as an old aquarium.
Next up, you have to choose the location for the container. Mealworms enjoy and thrive in dark, warm, and humid environments. Make sure that your farm is in the shade, away from the sun or a direct source of heat. If you’re not too squeamish, you can even place them in one of the closets in your house.
For those living in an area with cold winters, low temperatures can be an issue. You can deal with this by purchasing a heat mat designed for keeping reptiles or similar pets. They’re very easy to install, come pre-wired, and commonly have programmable thermostats.
Step 3: Adding the Substrate
When you finish setting up the container, the next step is to provide food for your mealworm colony. You’ll need to fill the container with the substrate about three inches deep. For substrate or bedding, you can use wheat bran, oatmeal, chicken mesh, or cereal crumbs. Remember that mealworms not only feed out of this bedding but also live in it. So, they’ll need some freedom to move around freely, That’s why you can’t use flour or other fine-milled grains.
Before adding substrate to the container, you have to disinfect it and make sure that it doesn’t contain any pests such as grain mites. To do this, you can put it in the microwave for around a minute or freeze it for three days.
As mealworms don’t drink water, you will provide enough moisture for them by adding vegetable or fruit slices. Several slices of carrot or potato will do just fine. If you live in a dry climate, increase the number of slices you add to the bedding.
Finally, you should insert a couple of pieces of old ones paper or cardboard. Mealworms will use them for hiding as they enjoy dark places.
Step 4: Adding Mealworms to Your Farm
While your ultimate goal is to create a self-sustainable farm that can reproduce itself at no cost, you still have to purchase the initial batch of mealworms. Your starter colony should have at least 500 mealworms. Depending on your plans, this number can be bigger. You can purchase them at specialized feed stores or online. Ask around before buying to make sure you get top-quality mealworms.
See prices on Amazon: https://www.amazon.com/live-mealworms/s?k=live+mealworms
In any case, make sure that you buy them from a trusted source. If possible, try to find out what the mealworms were fed before the purchase. This can influence the health as well as the health of your chickens.
A lot of people make the mistake of buying gigantic worms thinking that they will provide more food for the chickens. However, you should avoid this, as those mealworms were likely treated with growth hormonal agents. While this makes them bigger, it prolongs the pupating process and creates sterile beetles.
When you finally acquire your first batch of mealworms, pour them gently into the container and put the lid on top of it.
Step 5: Maintaining Your Mealworm Colony
Once you see up the colony, all that is left is to feed your mealworms and watch them grow. This is the easiest part of the process. All you have to do is add some food occasionally to maintain the 3-inch depth of the substrate and replace the bedding every 3 or four months.
Also, from time to time, add a couple of new bits of vegetables or fruit. In addition, keep an eye on the state of the container so you can notice potential issues such as mould.
Step 6: Harvesting the Mealworms
In 3 or 4 months, your farm will be ready for harvesting. You can harvest mealworms at any time, but it’s best to wait until they reach the full size. Still, be careful not to wait too long as they will pupate and eventually turn into beetles. Still, make sure to leave some of the larvae unharvested so you can ensure the continued reproduction cycle.
When harvesting, you can pick mealworms by hand, but this is rather time-consuming. The better way is to place a carrot or similar vegetables in the container and wait for a couple of minutes. The larvae will soon swarm and latch onto the vegetable. All you have to do now is pick it up and shake it off above another container.
Mealworm Long-Term Storage: Live and Dead
Sometimes you’ll have plenty of full-grown mealworms that you still don’t need. In this case, you can store them and save them for later use.
In order to keep the mealworm in this stage of the life cycle, you’ll need to place them in the refrigerator at (45 – 50 °F ). At low temperatures, mealworms cease their metamorphosis and go dormant meaning they don’t need food to survive.
They can stay in the refrigerator even for a couple of months, I recommend that once a week, you may take them out for a day and leave them on the prepared bedding at room temperature. This will further prolong the time they can spend in the refrigerator.
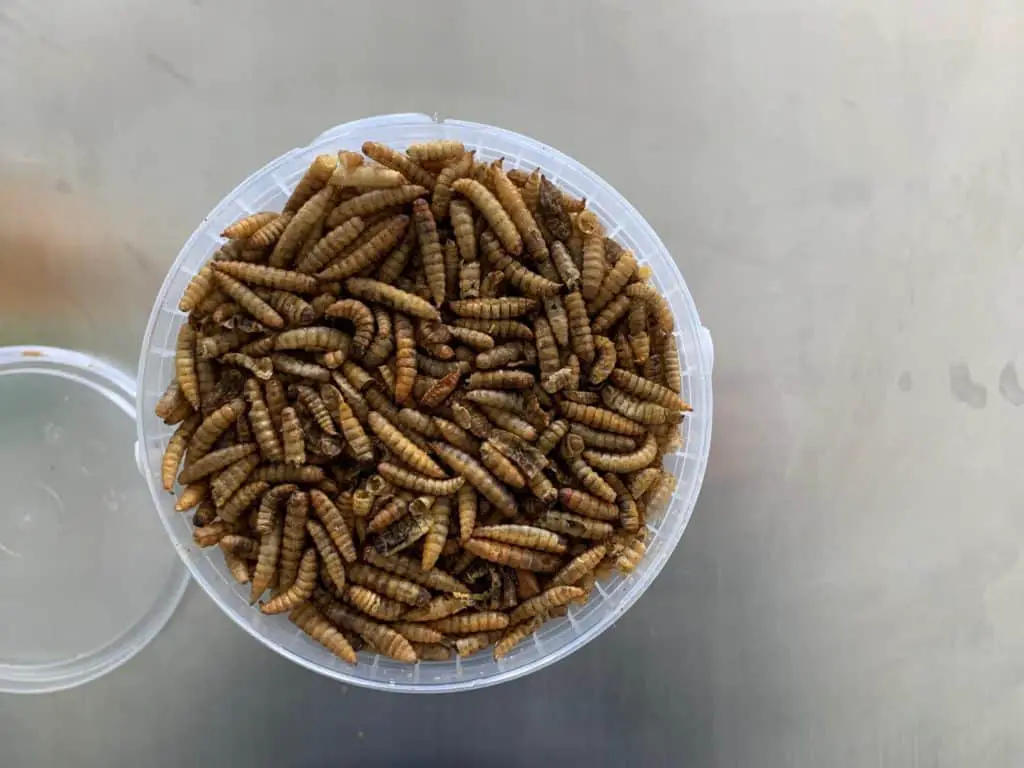
Another storage option is drying your mealworms. You can dry them on a stove or use the food or clothes drier. Also, you can dry them outside. This is probably the better option, as dying them inside, even on a stove or in a dryer can really stink up the place.
How Do You Kill Mealworms (Humanlly)?
In some situations you may want to kill your mealworms and get rid of them,
For example, if the colony has become infested, You can easily do this by pouring boiling hot water over them, or simply leaving them outside and letting the wild birds take care of them.
Do You Need to Kill Mealworms Before Feeding to Chickens?
You can freely feed live mealworms to your chickens. Even if they transform into Darkling Beetle, it’s still perfectly safe. However, this likely won’t happen as your chickens will gobble them right away.
You also need to know…
Essentials
FAQ
What do mealworms drink?
Mealworms get all the moisture they need from the slices of vegetables or fruit you add to their substrate.
Do mealworms bite?
Mealworms are capable of biting and they do have mandibles. However, they’re so small, that there’s no way that they can harm you.
Can you touch mealworms?
You can safely handle mealworms at all stages of their development. However, prolonged exposure may cause some people to develop allergies. So, it’s best to be on the safe side and wear a mask and gloves while tending to your farm.
Do mealworms have feelings?
Like all animals with simple nervous systems, mealworms can’t process emotional information, so they don’t feel suffering. Still, according to some of the latest studies, they can feel the pain to some extent.
Are black mealworms dead?
Mealworm or Pupae turning black is usually a sign that they’re dead. The most likely reason is the lack of moisture at the end of the larval phase.
Why are my mealworms turning into beetles?
Mealworm turning into beetle is a normal part of their life cycle. It has four stages: egg, larva (or mealworm), pupa, and beetle.
Do mealworms eat coffee grounds?
You can add coffee grounds to the mealworm diet. However, as they’re fine-ground, you should add only small quantities and not make the substrate solely of the coffee grounds.
Do all mealworms turn into beetles?
Eventually, all healthy mealworms will turn into beetles. It’s a normal part of their maturing process.
Do mealworm beetles fly?
Darkling Beetles, who mealworms transform to, can’t fly. So there’s no danger of them flying out of the container.

